
- Quill of Gemination Guide - June 16, 2022
- Kagrumez Resonance Gem Guide - May 19, 2022
- Quarried Stone Skyrim Guide - May 17, 2022
In this Fahlbtharz guide, I’m going to run you through how to solve the Fahlbtharz puzzles so that you can get your hands on the Visage of Mzund. A lot of players consider the Visage to be one of the strongest helms in all of Skyrim, so it’s more than worth spending the time needed to obtain it.
Fahlbtharz itself is a well-designed dungeon. At least, it is by Vanilla Skyrim’s standards. Its unique gimmick of gears and puzzles lets Fahlbtharz stand out from the usual Dwemer ruins you would find back on mainland Skyrim, and it looks very visually distinct. Granted, its puzzles are far from difficult, but they are a notable step up from the rotating pillars you would be used to at this point.w
I had clocked in hundreds of hours before the Dragonborn DLC for Skyrim was even released, and that was years ago. By now, I’ve got easily four digits invested in the game over the course of three different console generations. In other words, I know a thing or two about the game. So, when I say that Fahlbtharz is one of the better-designed dungeons in all of TES V, I really do mean it.
Here’s a full Fahlbtharz guide to help you navigate the ruins yourself, including how to solve the puzzles, and what the Visage of Mzund actually does.
Key Details Up Front
Related Characters: Eydis, Ulyn.
Related Quests: The Kagrumez Gauntlet
Notable Loot: Visage of Mzund, Kagrumez Resonance Gem
Related Abilities: Breath of Nchuak
Fahlbtharz Lore

Unfortunately, there isn’t much in the way of lore when it comes to Fahlbtharz. The ruins appear for the first time in the Dragonborn DLC, and there aren’t any lore books or conversations regarding the ruins, except for the two journals you find in the ruins themselves. All those journals tell us, though, is that these two explorers knew about the Visage of Mzund.
As for Mzund, there’s nothing. No mention of the name elsewhere, so we have no idea who or what Mzund is.
The Visage of Mzund gives you the power Breath of Nchuak, again there’s nothing really to go on here. However, there is a book titled ‘Fire and Faith’ written by a scholar of the name Nchunak, which we can assume is the same as the Nchuak that the Visage references.
Fire and Faith speaks about Nchunak’s journey across different Dwemer cities in an attempt to learn the teachings of Kagrenac, a famous Dwarven philosopher and magecrafter. The passage that’s included in-game, however, doesn’t give us much of a hint as to the identity of Nchunak, Mzund, or the purpose of Fahlbtharz.
Key Features
How to Solve the Fahlbtharz Puzzles

Puzzle One
The first Fahlbtharz puzzle, if you can even call it that, is at the very start of the dungeon. At the entrance, you’ll find a Dwarven control panel with 10 different buttons, and it’s up to you to figure out the right one.
Rather than just hitting them randomly and hoping for the best, just press button nine. That’s the correct button and will open the gate so that you can proceed forward through the dungeon.
Puzzle Two
The second puzzle is a little bit more methodical than the first one, but not by much. You’ll eventually reach the Fahlbtharz Boilery. Inside the boilery, there is a large ring of Dwemer nodes on a wall, with six Tonal Resonators next to it. There are three resonators on the left, and three on the right.
The idea of the puzzle is to light up all of the nodes without overloading them, with each resonator transferring a specific amount of power to the ring of nodes.
The correct solution for the puzzle is to hit the first resonator, then the second one, and then the fifth one. This is the only correct combination to this puzzle.
Fahlbtharz Walkthrough
Enter Fahlbtharz and use the Control Panel
The entrance to Fahlbtharz is populated by Rieklings, granted that won’t last too long. Take out what few of them are dotted around the entrance and make your way inside the ruin.
Once in the Fahlbtharz interior, walk down the entrance ramp, past the crumbling stones, and you’ll end up at an open gate with a button next to it. All this button does is open and close that gate, but this serves as an environmental hint as to what this dungeon is all about. To emphasize that point, in the very next room you’ll find a Dwemer control panel with 10 different buttons. There are two rows of five buttons and each one does something different.
For the most part, all of the buttons except for two can be disregarded. The seventh button, with button one being the top left button, will open the door opposite the control panel, letting you loot the chest behind it. The ninth button is the actual button you’re looking for, though, because that’ll open the way forward.
Pretty much all of the other buttons set off traps or spawn in enemies, so I wouldn’t waste time seeing what each and every single one does.
Hit the Two Tonal Locks and Proceed to the Gear Room
Once you’re done with the control panel, continue through the now open gate to your left and through the set of doors. Directly in front of you, down a stone ramp, will be a Tonal Resonator. These are the same Tonal Resonators that you probably encountered during Lost to the Ages in the Dawnguard DLC. They function the same here as they did there. So, give the resonator a smack and it will spin upwards.
Continue downwards into a web-infested path and you’ll be able to find a second Tonal Resonator behind a wall of thick webs. Destroy the web and hit this resonator before you continue.
Keep walking and you’ll eventually be led out into a large chamber with a floor made up of several different spinning gears. There are also several towers with bridges dotted across these gears. You’ll be spending the rest of your time in Fahlbtharz in this area.
Turn on the Valve and Activate the First Lever
In the gear room, there are four different exits. The first exit is the one you’re standing at now which leads to the rest of the Fahlbtharz dungeon. The second exit leads you to the end of the dungeon and is across the room directly opposite you. The last two exits are on the left and right-hand sides of the room. Both of these exits lead to side chambers that you need to complete to proceed through the gear room.
First, you’re going to make your way to the side chamber on the right-hand side of the room. If you’re looking from the doorway you entered, you should just be able to see where you’re going.
Make your way to the right gears and dropdown. Follow these gears around and enter the door marked Fahlbtharz Corridor. Inside the corridor, make your way up the stone stairs to your right. There is a locked gate here with a bit of loot behind it, but you can ignore that if you want. Once up the stairs, opposite the locked gate, there will be a door that leads you back into the gear room. Enter that door.
Back out in the gear room, you’ll now be on an elevated platform. Look left and interact with the red valve in front of you. Then, use the lever directly next to the valve. This will cause the tower opposite you to spin, lining itself up with the platform you’re currently on.
Walk straight across the tower and continue until you reach a locked gate. Turn left, and you’ll see that the bridge in front of you is a dead end. Walk out onto the bridge and look at the gear below you to the right. You’ll be able to see a Stalhrim Shield on this gear.
Take the shield, or don’t, and proceed forward towards the stone stairs in front of you. Go up the stairs, and into a door labeled Fahlbtharz Boilery.
Solve the Fahlbtharz Boilery Puzzle

Inside the boilery, follow the path around and you’ll eventually end up on an elevated platform opposite a strange-looking Dwarven mechanism. There will be a dead Dunmer named Ulyn at your feet. On the corpse, you’ll find a bow with some arrows, as well as Ulyn’s Journal.
The journal contains clues on how to solve the puzzle you’re looking at, and the bow and arrows are there as a failsafe in case you didn’t bring your own. You can use the journal with trial and error to solve the puzzle for yourself if you want, but I wouldn’t subject myself to that kind of monotonous misery personally, so I’m just going to tell you the solution.
Looking at the puzzle opposite the platform you’re standing on, you’ll see a large ring made up of weird Dwemer node-like devices. Next to this ring, there are six Tonal Resonators. There are three to the left of the ring, and three to the right.
From where you are now, looking at the ring, we’re going to label these resonators one to six, with one being the furthest one to your left, and six being the furthest to your right.
Using either a bow or a projectile spell, hit the resonators in this order:
- One
- Two
- Five
This is the only solution to the Fahlbtharz puzzle, hitting any other resonator will result in the large ring overcharging, spawning Automatons, or spinning blades.
Once you successfully complete this puzzle, the gate to the left of the puzzle will open. Follow the path through this gate, hitting the Tonal resonator on your way to unlock a shortcut, and take the upper door out into the gear room.
Back in the gear room, use the level that should be directly in front of you. The tower opposite your platform will spin and line itself up with you. Walking across the tower, you’ll need to hop onto the elevated series of spinning gears to your right to make it across to the next tower. From there, follow the bridge and take a left. You’ll be face to face with a new Tonal Resonator.
Hit the resonator and the tower you were just on will spin. Either jump to the tower’s bridge as it’s spinning, or wait for it to finish its rotation and jump to it afterward. You might need to use Whirlwind Sprint to successfully make this jump, though. If you do fall down, you can make your way back up through the boilery or Fahlbtharz Corridor.
Either way, you’ll now be able to follow the path through into the Grand Hall.
Enter the Grand Hall and Loot the Visage of Mzund
Inside the Grand Hall, take either the left or right path to reach an elevated platform that looks over the area. On the platform, you’ll find three Dynamo Actuators. Only one of these actuators is currently working. To turn the other two on, you’ll need two Centurion Dynamo Cores.
I’m going to assume that you don’t just keep two of these in your back pocket for some unknown reason, in which case you’ll need to loot two. Thankfully, directly below the platform with the actuators, you’ll find two Centurions. Kill the pair of them, loot their cores, and slot them into the Dynamo Actuators to unlock the final gate in front of you.
Through the gate, you’ll find a stone table with a leveled battle-ax, the Visage of Mzund unique helmet, as well as one of the five Kagrumez Resonance Gems. To the left of the table, you’ll find the elevator that takes you back to the surface.
Related Special Abilities
Breath of Nchuak
The Breath of Nchuak is a lesser power that you get access to while wearing the Visage of Mzund. Unlike most other lesser powers, this power isn’t subject to a once-per-day usage cooldown. Instead, each time you use the power it will cost you 85 Stamina.
The Breath of Nchuak is essentially the same as a Centurion’s steam attack. It shoots out a jet of steam that deals 15 points of damage per second to anyone caught in its blast at the cost of Stamina. This attack can actually be activated while you’re blocking, meaning it is actually viable in high-difficulty combat.
How to Find Fahlbtharz

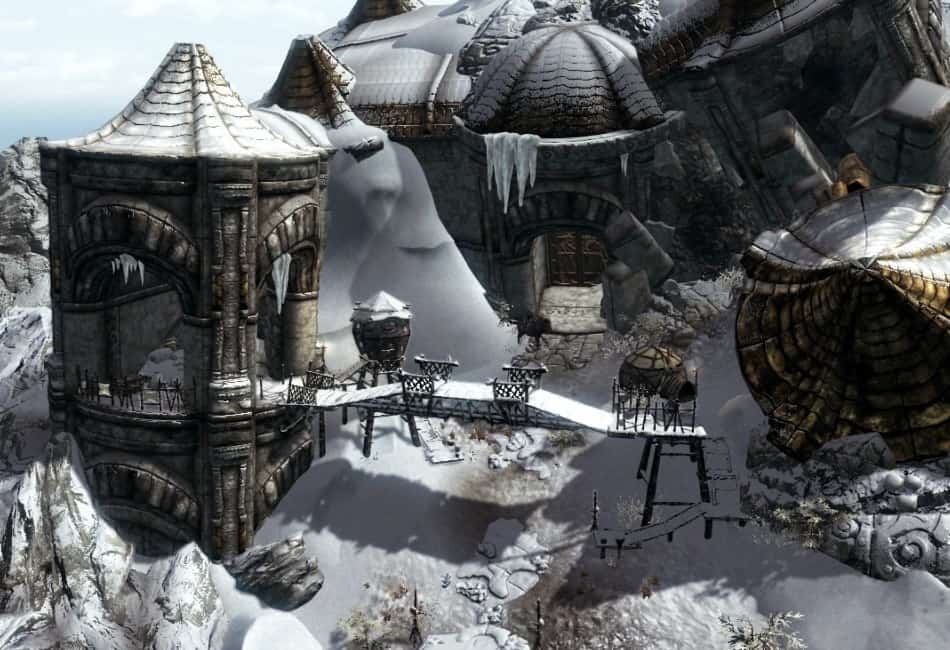
Fahlbtharz is in the Northern region of Solstheim, almost directly North of Raven Rock and directly West of Skaal Village. If you head upwards starting at Raven Rock, you’ll find it eventually. It’s tucked into the mountains, so you might need to do some looking around to find the intended path into the ruins.
Residents and Unique Items
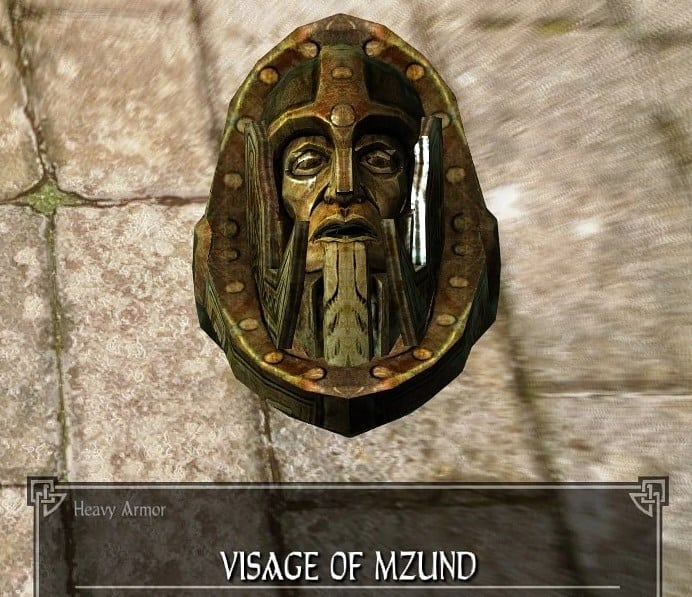
Visage of Mzund
The Visage of Mzund is the main attraction of Fahlbtharz. It’s the main reason people want to clear the dungeon, granted not the only one. It’s a unique heavy Dwarven helmet that unfortunately doesn’t have a unique look to it. Given that many people consider it to be the best helmet in the game, that’s a massive shame.
The Visage is found at the very end of the dungeon in the final room, and when equipped gives you access to a lesser power called Breath of Nchuak. When you use this power, it will drain your Stamina to shoot steam from the helmet, dealing damage to anyone in front of you. This attack does a deceptively high amount of damage, doesn’t have a cooldown, and can be used while you’re blocking, making it an incredibly strong ability.
Kagrumez Resonance Gem
There are five Kragmuez Resonance Gems on the island of Solstheim. You need four of them to complete the related quest, The Kagrumez Trials. These gems essentially act like keys for that quest. They have no use beyond that, but one of the five is located on the table at the end of Fahlbtharz, next to the Visage of Mzund.
FAQs
Question: How do you solve the puzzle in Fahlbtharz?
Answer: To solve the puzzle in the Fahlbtharz Boilery, you need to shoot the Tonal Resonators in this order:
First resonator.
Second resonator.
Fifth resonator.
Question: What is inside Fahlbtharz?
Answer: The Dwemer ruin of Fahlbtharz is home to the Visage of Mzund – a unique Dwemer helmet that gives you access to the Centurion’s steam breath attack. The ruin also has one of the five Kagrumez Resonance Gems.
Question: Where is the gem in Fahlbtharz?
Answer: The Kagrumes Resonance Gem in Fahlbtharz is found in the last room of the dungeon, inside the Grand Hall next to the Visage of Mzund.
Fahlbtharz Guide: Conclusion
That’s it for my Fahlbtharz guide. Despite being unique and distinct, the entire ruin can be completed in under 10 minutes if you know what you’re doing. That, combined with the lack of any real boss fight, is a shame but doesn’t put too much of a dampener on the whole experience. The dungeon is very fun and a big step up from the Dwemer ruins found in the vanilla version of Skyrim.
Plus, the Visage of Mzund is an incredible piece of gear that’s well worth picking up regardless of whether or not you want to use it. On top of that, one of the Kagrumez Resonance Gems is located in Fahlbtharz, so you’ll probably need to come here during The Kagrumes Trials, regardless.
So, I hope this guide helps you in some way, shape, or form. At the very least, my puzzle solutions should help you shave a handful of minutes off of your dungeon clear time.