
- Quill of Gemination Guide - June 16, 2022
- Kagrumez Resonance Gem Guide - May 19, 2022
- Quarried Stone Skyrim Guide - May 17, 2022
I put a hell of a lot of time into Skyrim. It is possibly the first game I ever hit 100 hours in. I had it on PS3 back in the day. Anyone that also had it on PlayStation knows exactly what that means with respect to Dragonborn, in that we got it months after it came out due to Bethesda struggling with the port.
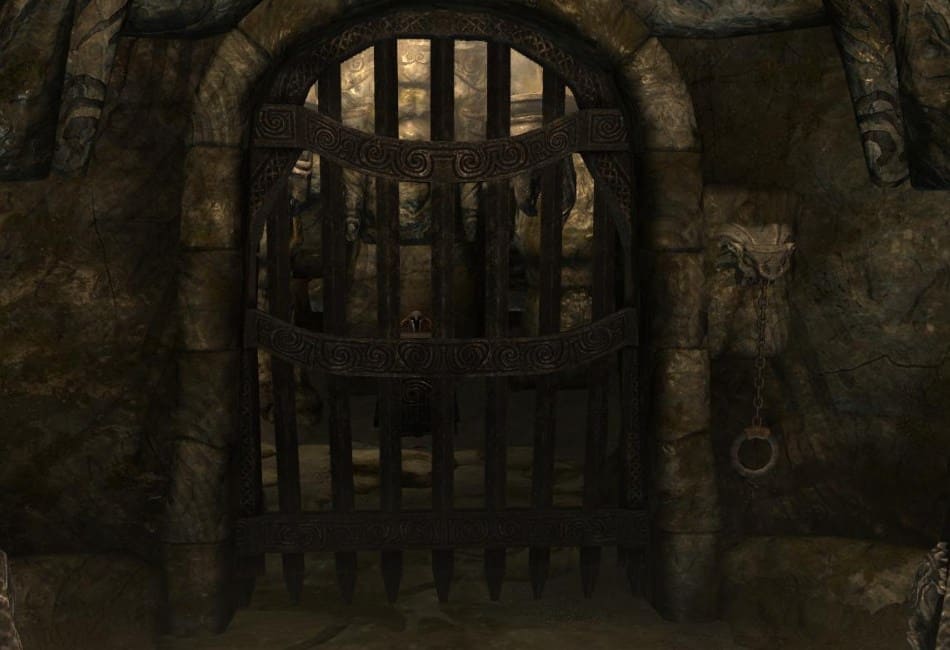
That wait just made my time with Dragonborn all the sweeter, though. The DLC was a massive step-up from vanilla Skyrim in almost every respect. Maybe I’m just looking at it through rose-tinted glasses, but I think that Kolbiorn Barrow perfectly encapsulates the effort that Bethesda put into each individual location and quest in Skyrim’s DLC content.
The barrow, and the quest Unearthed which takes place there, had no right being as long, engaging, and rewarding as they were. What could have been another cookie-cutter dungeon was given lore, interesting characters, and an abundance of unique gear for the taking.
That’s why I’ve put together this Kolbiorn Barrow guide. I’m going to run you through a bit of the barrow’s history, the unique items you can find there, and how to complete the Unearthed quest that takes place there.
Key Details Up Front
- Location: Solstheim, Southeast of Raven Rock.
- Loot: Ahzidal’s armor set, Ahzidal Dragon Priest mask, Hoarfrost Ancient Nord Pickaxe.
- Enemies: Draugr, Dragon Priest.
- Related Quests: Unearthed.
- Related Characters: Ralis Sedarys, Ahzidal.
Lore
Kolbiorn Barrow is the final resting place of Ahzidal. Ahzidal was an ancient Nordic enchanter from Saarthal. He’s believed to be the first Nord to ever master the elven arcane arts, including learning the seven natures of metal from the Dwemer, as well as ancient runes and dawn magic from the Ayleids. He is also credited with helping Ysgramor and the 500 Companions liberate Saarthal after elves raised the city.
During the Merethic Era, Ahzidal was forced to flee Skyrim, landing in Solstheim after being betrayed by his fellow Dragon Priest. The priests believed that Ahzidal had been driven mad by his study of Oblivion and sealed him in Kolbiorn Barrow before erasing much of Ahzidal’s life from the history books.
The only group believed to know how exactly Ahzidal was sealed in the barrow was the Skall. This theory is supported by the fact that the barrow features various instruments used in blood rituals, similar to those found in Bloodskal Barrow.
The barrow was actually stumbled across by the Nerevarine in the third era after they were sent to retrieve a skull for a seer. Despite entering the barrow, they never encountered Ahzidal.
After the eruption of the Red Mountain during the Red Year, the Kolbiorn Barrow was buried in ash. The barrow remained buried until the Fourth Era when a Dunmer named Ralis Sedarys excavated it with the assistance of the Dragonborn.
Related Quests
Unearthed
Okay folks, strap yourselves in because this is going to be a long and expensive ride. To start Unearthed and gain access to Kolbiorn Barrow, you’ll need to speak with Ralis Sedarys. Ralis can be found trying to excavate the barrow just Southeast of Raven Rock.
When you ask him for a chat, he’ll recant the story of Ahzidal to you. Ahzidal was an ancient Nord enchanter and rumored to be the first Nord to ever master elven arcane magic. He is also responsible for Ysgramor’s victory over the Snow Elves of Skyrim, having enchanted the 500 companions’ weapons prior to the liberation of Saarthal.
According to Ralis, Kolbiorn Barrow is Ahzidal’s final resting place. He’ll explain that he’s been hired by a private investor to enter the barrow and retrieve a set of enchanted artifacts that Ahzidal was buried with. These artifacts are said to be enchanted with extremely powerful effects and worth a fortune. As you can tell when you showed up, though, he’s not getting anywhere.
Ralis is only getting paid on delivery, meaning he doesn’t have the funds needed to start an excavation of the barrow. The sand storms of Solstheim are filling it in faster than he can clear it, so you’ll need to jump in to help.
Rather than grabbing a shovel, you’re going to be opening up your wallet. A lot. And you’ll be doing the hard work, too. It’s a pretty bum deal, but if anyone is going to be a victim of a fraudulent speculative investment, it’s the Dragonborn.
Investment 1 – 1000 Septims
To get things started, you’re going to have to cough up 1000 Septims. You’ll have to do this at serval different points during Unearthed, so get used to it now. Every time you give Ralis a handful of cash, you’ll need to fast travel away from Kolbiorn Barrow and wait for a few days. Eventually, a courier will come and tell you that he has a letter from Ralis. The courier will get increasingly irritated every time he delivers to you, probably because the Dragonborn never tips.
So, to get started on Kolbiorn Barrow, give Ralis 1000 Septims and leave the barrow. It doesn’t matter where you go, just go. Wait a few days until a courier comes to you with a letter, then return to the barrow.
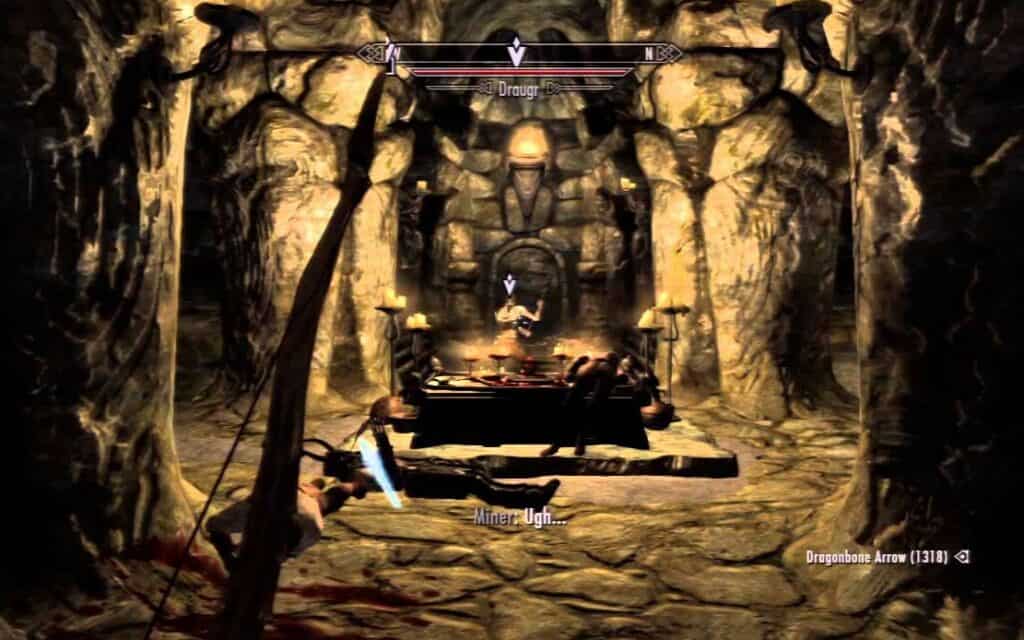
Upon speaking with Ralis, you’ll be informed that all of the miners you hired are dead. I mean, you wear digging up an ancient burial ground so I don’t know what either of you was expecting. You’ll need to head into the barrow yourself and clear out the Draugr so that it becomes a hospitable workplace environment again.
Clear out the Barrow

At this stage of the excavation, the barrow is fairly linear. Head forward, killing any Dragur you come across, and you’ll soon reach a chamber that seems to be a dead end. On a table in this chamber, you’ll find a strange-looking skull on a pressure plate. Remove the skull and a passage forward into the barrow will open. Inside the newly opened passage, you’ll find the first artifact: Ahzidal’s Boots of Water Walking.
You can’t go any further for now, so take the boots, kill the remaining Draugr, and return to the surface to tell Ralis it’s safe for the miners to go back to work.
Investment 2 – 2000 Septims
Well, it would be safe for the miners to go back to work if any of them were still alive. A few workplace deaths aren’t something a little capitalistic ambition can’t solve, though, so Ralis will ask you for 2000 Septims to convince a new set of miners to come work for you.
Hand over the gold, and once again leave the barrow. Wait a few days for the courier to arrive, then head back to see what the issue is this time.
Surprise! More Draugr killed your fresh batch of miners. What’s the definition of insanity again? Anyways, time to get yourself into the barrow to clear it out. Again.
Clear Out the Barrow… Again
Head back to where you found the boots last time you were here and you’ll see that a passage in front of you is now accessible. The room has also had some of the rubble and sand cleared out of it, but not nearly enough for you to access the now audible Word Wall there.
Pass through the passage and interact with the body of Bradyn to confirm that this miner is, in fact, dead. Take care of the Draugr surrounding poor Bradyn’s body and pull the chain that should be directly in front of you. Then, turn right into another room. Defeat the Draugr there, then pull the chain in that room, too.
Turn around and head straight into another room, up some steps. Watch out for the tripwire that’s rigged up at the top of them. Make sure you don’t get zapped by the Soul Gem trap, either. You should then be right next to a series of locked gates leading up a staircase. To your right, you’ll see four different levers. The levers need to be pulled in the following order to unlock all of the gates:
- First.
- Second.
- Forth.
- First.
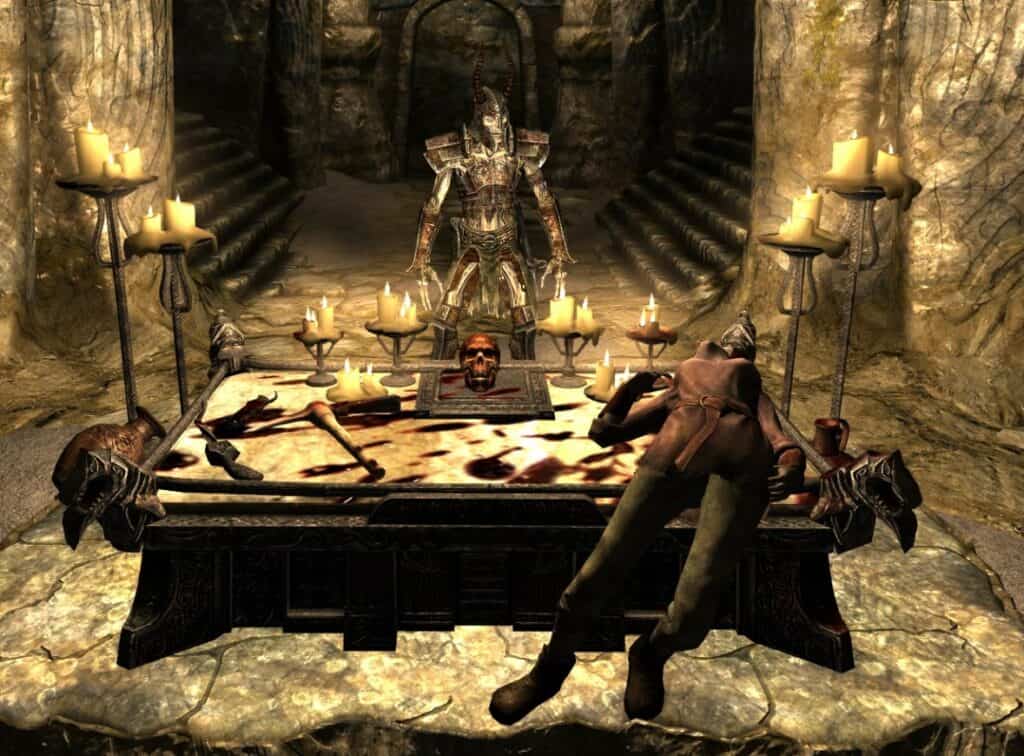
Head up the stairs and you’ll find the corpse of another miner, Mireli, sprawled out on what appears to be a sacrificial stone of some kind. There’s a letter to her mother on her body, but otherwise, you can ignore her.
Kill the Draugr in the room and a door to your right will open, giving you a shortcut back to the barrow’s main room. Before you return to Ralis, though, go straight passed Mireli and you’ll come to a small alcove. If you hug the wall, then turn and look at the stone shelves behind you, you’ll see a small lever. Pull the lever and the wall will open, revealing the second artifact: Ahzidal’s Ring of Necromancy.
After taking the ring, you can return to the surface.
Investment 3 – 3000 Septims
Are you starting to feel like a sucker yet? Because you should. This time around, Ralis will inform you that he plans to hire some mercenaries as well as more miners. You’ll need 3k to cover the cost, so hand your gold over and leave the man to work, or at least to find people to do his work for him.
Once you get your next letter and return, you’ll be pleasantly surprised by the fact that some of the miners are still alive. The mercenaries, however, weren’t so lucky. Needless to say, you need to head back into the barrow yourself to clear it out so that Ralis can hire more miners and continue digging out the ruins.
Clear Out the Barrow Again… Again
It’s immediately clear that a lot more of Kolbiorn Barrow is accessible now. You’ll be going the same way you did last time at first, so head back to the area where Bradyn and the two pull chains were.
Rather than going straight on, you’ll see that there’s now a room where a wall used to be, as well as a door. Kill the Draugr and ignore the door for now. Instead, pull the chain you find in this new room and turn around. Immediately take a right, then a right again, and you’ll be back at the second chain you pulled the last time you were in the barrow. The wall next to you will now be open, revealing the third artifact: Ahzidal’s Gauntlets of Warding.
Take the gauntlets and head back through the door and down the massive staircase in front of you. There’ll be a bunch of Draugr in front of you, as well as a staircase to your right. Take the staircase up and you should be in a large open room with a big square of pressure plates on the floor. To your left, you’ll see a sealed-off room with the next artifact.
Needless to say, the pressure plates are connected to getting that gate open. You don’t need to run over them in any certain order. Instead, you’ll need to hit each one of them within a time limit. That time limit is remarkably low, so you won’t be able to do this by just running. If you have the Whirlwind Sprint shout, you can technically complete the puzzle with that. Alternatively, and more ideally, take advantage of the Slow Time shout to activate them all quickly.
Once the gate is open, grab the fourth artifact: Ahzidal’s Ring of Arcana.
Head up the wooden staircase in the room with the pressure plates and open the gate in front of you. Then, dodge the swinging axes in the following corridor and pull the chain at the end. This will stop the axes, open the gate in front of you, and drop a drawbridge, bringing you back to Kolbiorn Barrow’s main chamber. From there, proceed back outside to Ralis.
Investment 4 – 5000 Septims

You’re almost at the finish line now, but before that, you need to open your bank account again. This time, Ralis will need five grand to convince some miners and guards to come work for you. You’ve garnered a pretty nasty reputation as an employer, what with your ridiculous employee turnover and all.
So, same thing as before. Pay the gold, fast travel away, and wait for a courier. This time when you arrive back at the camp, it’s clear that things have gone horribly, horribly wrong. Not only is Ralis nowhere to be seen, but there are dead miners strewn about the place. You’ve essentially walked into the aftermath of a massacre.
Your insurance isn’t going to cover this, so you need to figure out what happened. Your quest marker will point you towards Ralis’ desk. More specifically, it’ll point you towards the series of journals on his desk. They’re numbered, so you should make a point of reading them in order.
To summarize them, though, Ralis never had a private investor. Ahzidal himself had gotten into his head all Cthulhu-like and manipulated him into excavating the barrow. The close Ralis got to unearthing him, the crazier Ralis became. Needless to say, he snapped and killed off all the miners himself. If you’ve been paying attention up to this point, you’ll also have realized that he’s responsible for the previous miner deaths, too.
You’ve been a victim of fraud and deserve compensation! So, head back into the barrow one final time.
Clear Out Kolbiorn Barrow One Final Time
This time around, the main chamber has been fully excavated, meaning you can finally get that Word Wall. The wall contains one of the words for the Cyclone shout. This shout is actually pretty awesome, it sends out a cyclone that deals damage and sends anything it hits flying up into the sky. Think of it as a vertical Unrelenting Force.
After getting the word of power, head back towards the room with the pressure plates. Rather than heading up the staircase that leads to that room, turn left and you’ll be into a newly excavated room with three Dragur sitting on chairs. Take them out and approach the pillar puzzle.
There are two pillars in this room, and these are the only two pillars you will have to interact with. In the same room, you will see a large grate on the floor that’s blocking your access to a spiral staircase. That’s the way forward. There is also a locked gate in this room that blocks your access to the fifth artifact: Ahzidal’s Armor of Retribution.
There is a way to solve this puzzle yourself, so go for it if you want. I’m just going to give you the solution, though. First, you want the code to open the gate blocking Ahzidal’s armor. To unlock the gate, align both pillars to read whale, and pull the lever.
Grab the armor, head back to the pillars, and make them both read Hawk. Again, pull the lever. This time, the grate in the floor will open, letting you continue downwards through Kolbiorn Barrow.
Head down the spiral staircase, down the stone stairs towards the catacombs, and immediately look to your left. You’ll see another gate flanked by two pillars. Behind that gate is the sixth and final artifact: Ahzidal’s Helm of Vision.
Rotate both of these pillars so that they each read Snake, then pull the chain next to the gate. The gate will rise, giving you access to the helm. From this point on, you don’t need to worry about missing any unique gear.
Turn around and you should see a door across from you on the other side of the room. Head through that door and you’ll discover Ralis going on a bit of a mad one. He’ll spawn Ahzidal himself in through some blood ritual before promptly being yeeted across the room like a ragdoll.
You’re finally at the final boss fight and let me just say, Ahzidal really is no pushover. He will ruin your day on most difficulties, so make sure you’ve got plenty of healing potions on hand.
Take care of Ahzidal whatever way you can and he’ll turn into ash. You’ll want to search his body because he has one final unique piece of gear, granted it’s not associated with the set you collected throughout the barrow. You’re looking for his Ahzidal Dragon Priest mask. It looks the same as the other Dragon Priest masks in Dragonborn, but that’s not inherently a bad thing since they all look awesome.
As far as Dragon Priest masks go, this one is pretty powerful, too. It gives you +25% fire damage and +50% fire resistance, making it perfect for a fire mage build.

At this point, Ralis will start to wake up after being flung earlier. His trance is now broken and he’s visibly distraught and confused. He’ll tell you about the voices he was hearing and beg you to believe him. At this point, you have two options.
If you choose not to believe Ralis, you will have to kill him. He has a unique Nordic Pickaxe on him, but you’ll gain access to this if you forgive him. So, aside from roleplaying reasons, there’s no practical advantage to killing him. If you believe and forgive him, he’ll make his way back to The Retching Netch in Raven Rock. There, you’ll be able to recruit him as a companion and take his unique Pickaxe Hoarfrost from him.
Regardless of how you deal with Ralis, Unearthed will complete and a tunnel out of the room will open. Follow the tunnel and you’ll end up in a room with the Black Book: Filament and Filigree. Read and take the book and you’ll officially be done with Kolbiorn Barrow.
Related Abilities
Cyclone
There is a Word Wall for the Cyclone shout inside of Kolbiorn Barrow. Cyclone is a particularly powerful shout, dealing damage and throwing anyone caught in its radius upwards. Its effect isn’t too dissimilar to Unrelenting Force, except your targets are thrown up instead of back, the shout also deals more damage.
The other two Word Walls for the Cyclone shout are located in Benkongerike and White Ridge Barrow.
Secret of Strength/Protection/Arcana
The Black Book: Filament and Filigree can be found at the end of Kolbiorn Barrow. If you read the book, you will be transported to a pocket of Apocrypha. Completing this mini-dungeon will then award you with one of three different powers, your choice of which can only be used once per day:
- Secret of Strength: Power attacks consume no stamina for 30 seconds.
- Secret of Protection: All incoming damage is reduced by half for 30 seconds.
- Secret of Arcana: Spells cost no magicka for 30 seconds.
You shouldn’t need me to tell you which of the three is the best. Secret of Arcana is completely busted. It’s akin to having armor that reduces the cost of your spells by 100%, but requires no enchantment leveling, making it a vital power for non-enchantment mages.
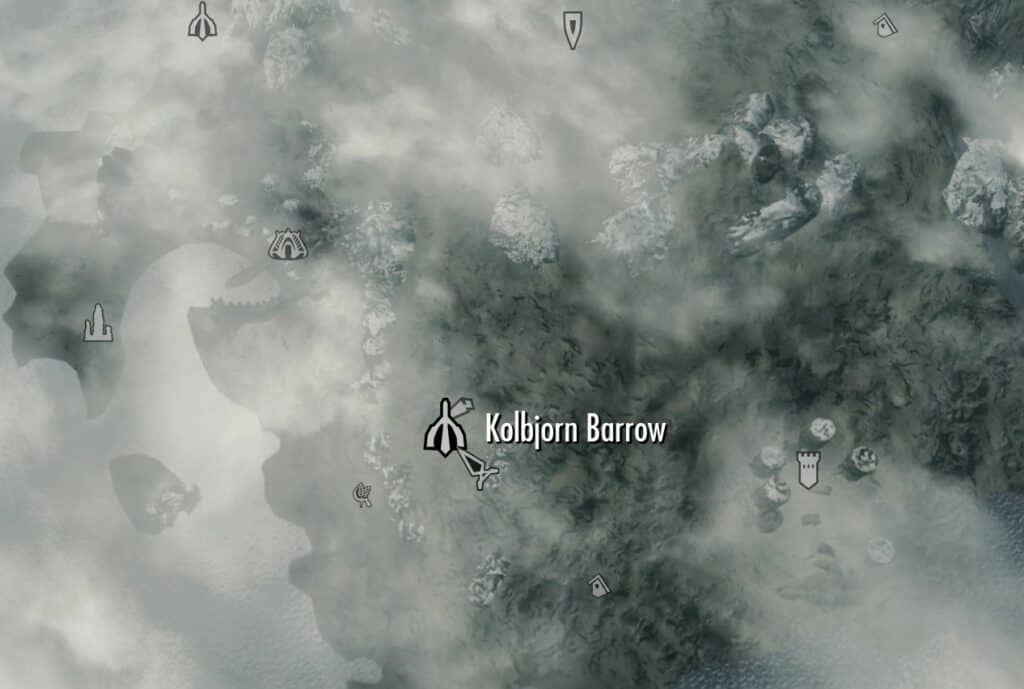
How to Find Kolbiorn Barrow
You really shouldn’t have too much trouble finding Kolbiorn Barrow. It’s located South of Raven Rock, a little east of Old Attius Farm. If you head to the farm, which can be found directly South of Raven Rock, then head directly East over the mountain range, you should stumble across it.
You won’t actually be able to see much of the barrow itself, but you will be able to see Ralis chipping away at the rock and ash with his pickaxe.
Unique Items in Kolbiorn Barrow
Investment 1
Ahzidal’s Boots of Waterwalking
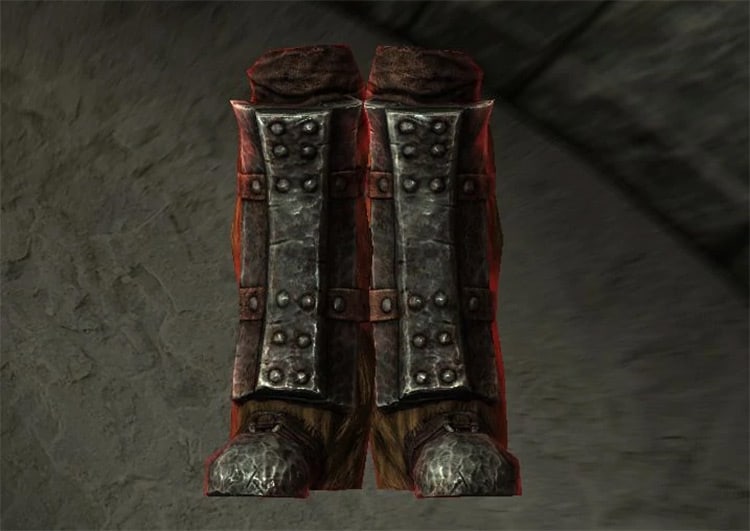
The first item of the Ahzidal’s armor set is the boots. They have a slightly higher base stat than regular Ancient Nord Boots, like the rest of the set. More importantly, they have a unique enchantment that allows you to walk on water while you have them equipped.
You can also walk on the tar you find in Apocrypha with them, as well as the lava in the Aetherium Forge. When you’re wearing the boots with exactly three other pieces of Ahzidal’s set, you’ll also get a +10 bonus to your Enchantment skill.
Investment 2
Ahzidal’s Ring of Necromancy
Ahzidal’s Ring of Necromancy fundamentally changes the way your reanimated followers work. With the ring equipped, whenever a creature you have reanimated takes damage, it will immediately explode and die, dealing 50 frost damage to anything caught in the explosion radius.
While this means your reanimations are going to die instantly, they will deal a lot more damage. You’re essentially turning them into living, moving bombs.
Investment 3
Ahzidal’s Gauntlets of Warding
Ahzidal’s Gauntlets of Warding make your wards 25% less effective. However, they now absorb 50% of the magicka incoming spells. Overall, this makes your wards more effective, but it’s up to you whether or not you want to use them. It’ll ultimately depend on your playstyle.
Ahzidal’s Ring of Arcana
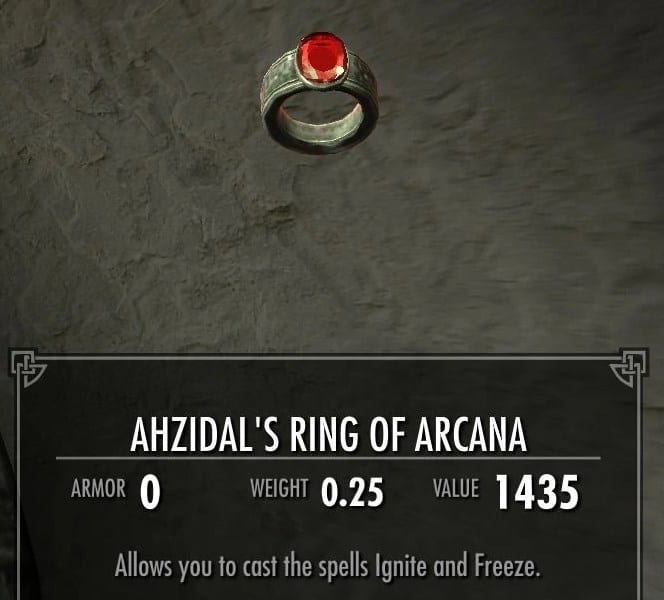
The Ring of Arcana is unique even amongst this armor set. Rather than giving you a buff of some kind, wearing the ring actually gives you access to two new spells: Ignite and Freeze.
Functionally, these spells are the same as Fireball and Ice Spike. They share animations with these vanilla spells and do similar enough damage. However, Ignite will set enemies it hits on fire for damage over time, and Freeze will slow enemies as well as damage them.
The negligible damage these spells do makes them useless in the late game, but it is an interesting gimmick.
Investment 4
Ahzidal’s Armor of Retribution
Ahzidal’s Armor of Retribution has a 5% chance to paralyze any enemy that hits you with a melee attack. This is pretty low, making it practically useless against single opponents. However, if you’re fighting multiple enemies, or an enemy that attacks quickly, its value grows exponentially.
Ahzidal’s Helm of Vision
The Helm of Vision is possibly the weakest piece of Ahzidal’s armor set. It makes both your Rune and Conjuration spells cost 25% more magicka, but you get a longer casting range for that tradeoff.
Now, I don’t know about you, but I never use Runes. I do use Conjuration, though, and I can’t think of a single time when I thought to myself, “damn… if only I had the ability to summon this Dremora Lord a few inches further across the room”.
As far as I’m concerned, not only is the extra range pointless, but the gauntlets are actively bad. Using them is essentially kneecapping yourself because it makes your spells more expensive.
Ahzidal’s Mask
Ahzidal’s Dragon Priest mask isn’t actually a part of the Ahzidal armor set, but it does share its name.
Like most other Dragon Priest masks in Skyrim, Ahizdal has a powerful and potent effect. When equipped, the mask makes your fire spells deal +25% more damage, and you also get +50% fire resistance.
While I’ll always advocate for enchanting your own gear, this is still an incredible option for anyone looking to build a fire mage, especially if you can get your hands on it early.
Hoarfrost
The last unique piece of gear in Kolbiorn Barrow is Ralis’ pickaxe Hoarfrost. When you attack someone with it, it deals 15 points of health and stamina damage. It also has a small chance to freeze the target solid.
Nobody in their right mind is ever using a pickaxe for combat, and this enchantment can’t be taken off the ax, making it practically useless. It still looks good in a trophy room, though.
FAQs
Question: How do I get deeper into Kolbiorn Barrow?
Answer: To get deeper into Kolbiorn Barrow, you’ll need to continuously give Ralis more money as he asks for it. You need to do this four times, starting with 1000 Septims and ending with 5000. In total, the excavation of Kolbiorn will cost you 11,000 gold. Each time you pay him, leave the area and wait for a courier to approach you with a letter from Ralis. Each time you get a letter, return to the excavation camp and clear out the Barrow. Each time you return, more of the barrow will be available.
Question: How do I open the door to get Ahzidal’s Ring?
Answer: To get Ahzidal’s Ring of Necromancy, you need to have progressed Unearthed to the second stage of the Excavation. In the room with a dead miner on a blood ritual stone, there will be a lever hidden behind some shelves with Soul Gems on them. Pull the lever and the wall behind you will open revealing the ring.
To get Ahzidal’s Ring of Arcana, you need to activate all the pressure plates in the room with the gate blocking your access to the ring. This can be done by either utilizing the Whirlwind Sprint or Slow Time shout. You will need to use one of these two to complete the puzzle. It is extremely difficult to activate all the plates in time otherwise.
Alternatively, you can get the Ring of Arcana by using Telekinesis to pull it towards you, allowing you to loot it through the gate.
Question: Is there a Word of Power in Kolbiorn Barrow?
Answer: Yes, there is a Word of Power and a Word Wall in Kolbiorn Barrow. Once you progress Unearthed to the final stage of the excavation, you will be able to read the Word Wall. The word contained there belongs to the Cyclone shout.
Conclusion
That’s all I’ve got for you in this Kolbiorn guide. The barrow is directly tied to Ahzidal, who is a great character, but it’s impossible to overlook the fact that he was written as a retcon to give the barrow a purpose that it didn’t have in Bloodmoon.
Despite that, it’s still an awesome dungeon and story, even if it costs you 11,000 Septims to get to the end of it. It’s also an incredibly annoying dungeon. The fact that almost all of the Ahzidal armor set is completely missable is a bit irritating, so make sure you don’t leave without all six pieces. Make a checklist, if you have to.
Given that the armor is scattered around the place, I made a point of keeping the Kolbiorn Barrow Unearthed walkthrough as simple and linear as possible. There’s a little more to the dungeon than what I went through, most notable a locked door with an Emerald Geode behind it. There are also a few locked chests dotted around the place, so loot them as you find them. Don’t be afraid to explore outside the bounds of this guide, I just kept it as straightforward as possible so that you didn’t miss any of the unique goodies.